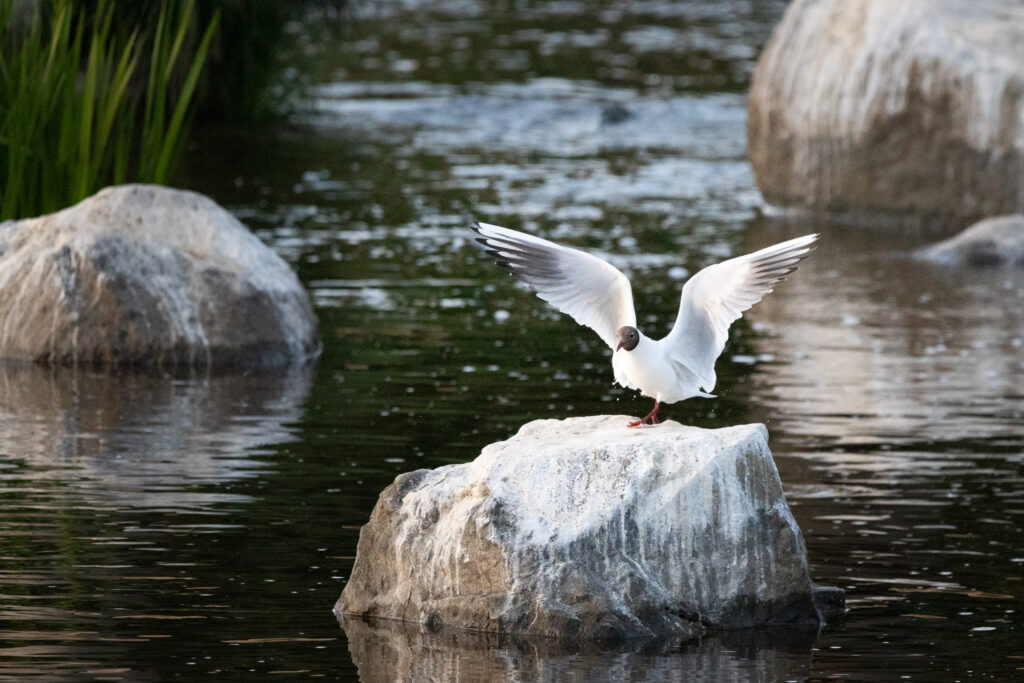
Shutter speed is one of the most important tools in a photographer’s kit, and it’s all about controlling how time is captured in your photos. Whether you’re trying to freeze a fast-moving object or create beautiful, flowing motion, shutter speed lets you decide how much or how little of that movement you want to capture.
What Is Shutter Speed?
Shutter speed refers to how long your camera’s shutter stays open, exposing the camera’s sensor to light. It’s measured in seconds (or fractions of a second), and the length of time it’s open determines the amount of motion captured in your image. A fast shutter speed (like 1/1000s) will freeze motion, while a slower shutter speed (like 1/30s or slower) allows for motion blur, creating a sense of movement in the image.
Freezing Motion with Fast Shutter Speeds
If you’re looking to capture a split-second moment with incredible sharpness, like a bird mid-flight or a car speeding by, you’ll want to use a fast shutter speed. Anything from 1/500s to 1/2000s or higher is typically what you’d use to freeze action. This prevents motion blur and results in crisp, sharp images where every detail is preserved.
For example, if you’re photographing sports, wildlife, or kids playing, a fast shutter speed is your go-to. The faster the action, the faster your shutter speed needs to be.
Here are a few typical situations where a fast shutter speed is useful:
- Wildlife photography – capturing birds in flight or animals running.
- Sports photography – freezing the motion of athletes during a game.
- Action shots – from fast cars to kids jumping into a pool.

Creating Motion with Slow Shutter Speeds
On the flip side, slow shutter speeds are perfect when you want to capture motion in a way that shows movement, like light trails from cars, smooth waterfalls, or ocean waves. Slower speeds let more time pass during the exposure, which means that moving objects blur while still objects remain sharp.
Speeds like 1/30s or slower are what you’d use to get that soft, dreamy effect with moving water or the artistic blur of city lights at night. Just remember, when using slower shutter speeds, it’s crucial to use a tripod to avoid unwanted camera shake.
Great examples of when to use slow shutter speeds include:
- Waterfalls or rivers – create that silky, flowing water effect.
- Night photography – capture the light trails from cars or the blur of people moving through city streets.
- Landscapes in motion – show the movement of clouds or grass in the wind.

Understanding the Shutter Speed Scale
1/1000s or Faster
For freezing fast action, such as a bird in flight, a speeding car, or an athlete in motion.
This ensures that the subject is sharp and free of motion blur.
1/250s to 1/500s
For everyday action, like people walking or children playing.
It freezes the motion while maintaining some natural movement blur.
1/100s to 1/200s
When taking portraits of relatively still subjects.
This range is fast enough to prevent blur from minor movements.
1/60s to 1/100s
In low light conditions where you can’t use a tripod, such as indoor events or parties.
Pair it with a higher ISO or wider aperture to avoid blur due to camera shake.
1/30s to 1/60s
For panning shots, where you follow a moving subject to create a motion blur effect in the background while keeping the subject relatively sharp.
1s and Slower
In night photography, especially when capturing light trails or cityscapes.
Use a tripod to keep the camera steady during long exposures.
1/4s to 2s
To create a smooth, silky effect with moving water in photos of waterfalls or streams.
A tripod is essential to avoid camera shake.
10s and Slower
For dramatic effects like light painting, capturing the movement of clouds, or very low light landscapes.
Always use a tripod for stability.
These are general guidelines, and the exact shutter speed can vary depending on your camera, lens, and specific conditions. Experimenting with different shutter speeds in these scenarios can help you find the perfect balance for your photos.
Balancing Shutter Speed with Light
One thing to remember when adjusting shutter speed is how it affects the exposure of your photo. A fast shutter speed lets in less light because the shutter is open for a very short time. This is great for bright conditions, but if you’re shooting in lower light, you may need to compensate by increasing your ISO or using a wider aperture to maintain proper exposure.
Slower shutter speeds let in more light because the shutter stays open longer. This is useful in low-light situations but can lead to overexposure in bright environments unless you adjust your other settings (like lowering your ISO or narrowing your aperture).
Getting Creative with Shutter Speed
Shutter speed isn’t just about technical control; it’s also a powerful creative tool. You can play around with different speeds to create artistic effects, like:
- Panning: This is when you follow a moving subject with your camera, using a slow shutter speed to blur the background while keeping the subject in focus. It’s a fun way to add a sense of speed to your photos.
- Long exposures: If you really want to get creative, experiment with exposures of several seconds or more. This is how you capture star trails, light painting, or even surreal nighttime landscapes.
Shutter speed is all about timing – controlling how much of it you capture in your images. Whether you want to freeze a split-second moment or show the flow of time, mastering shutter speed will give you the creative freedom to make your photos more dynamic.
So next time you’re out with your camera, take a moment to think about how you want to use time in your shots. Will you freeze it or let it flow? The choice is yours!